
Step by Step Tutorials 3
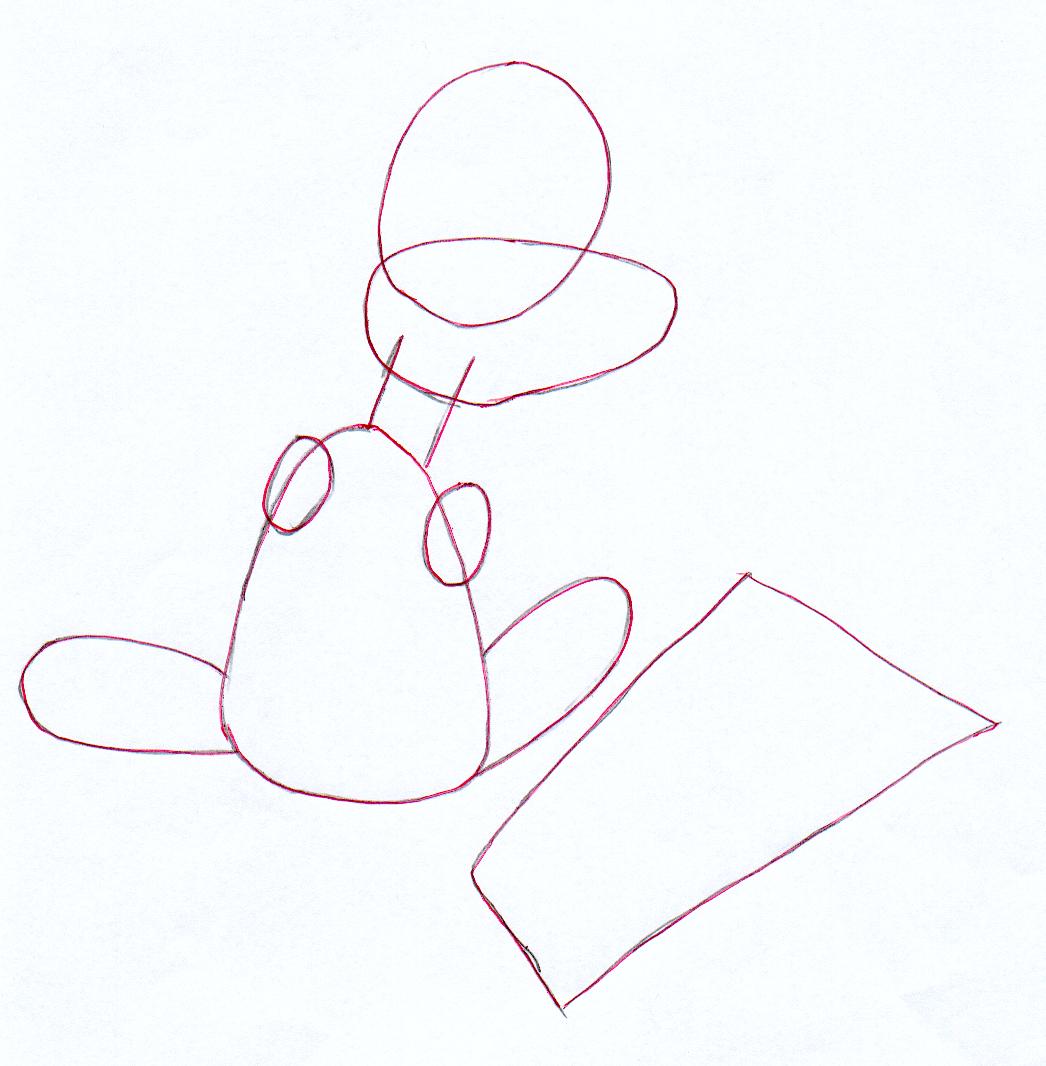 |
Step One
1st: Draw a flat oval head, then draw an oval shape for the snout 2nd: Draw a pear shape for the body and then part ovals for both legs 3rd: Draw small ovals for the shoulders and 2 parallel lines for the neck 4th: Draw a slanted rectangle for the basic shape of the cheese |
 |
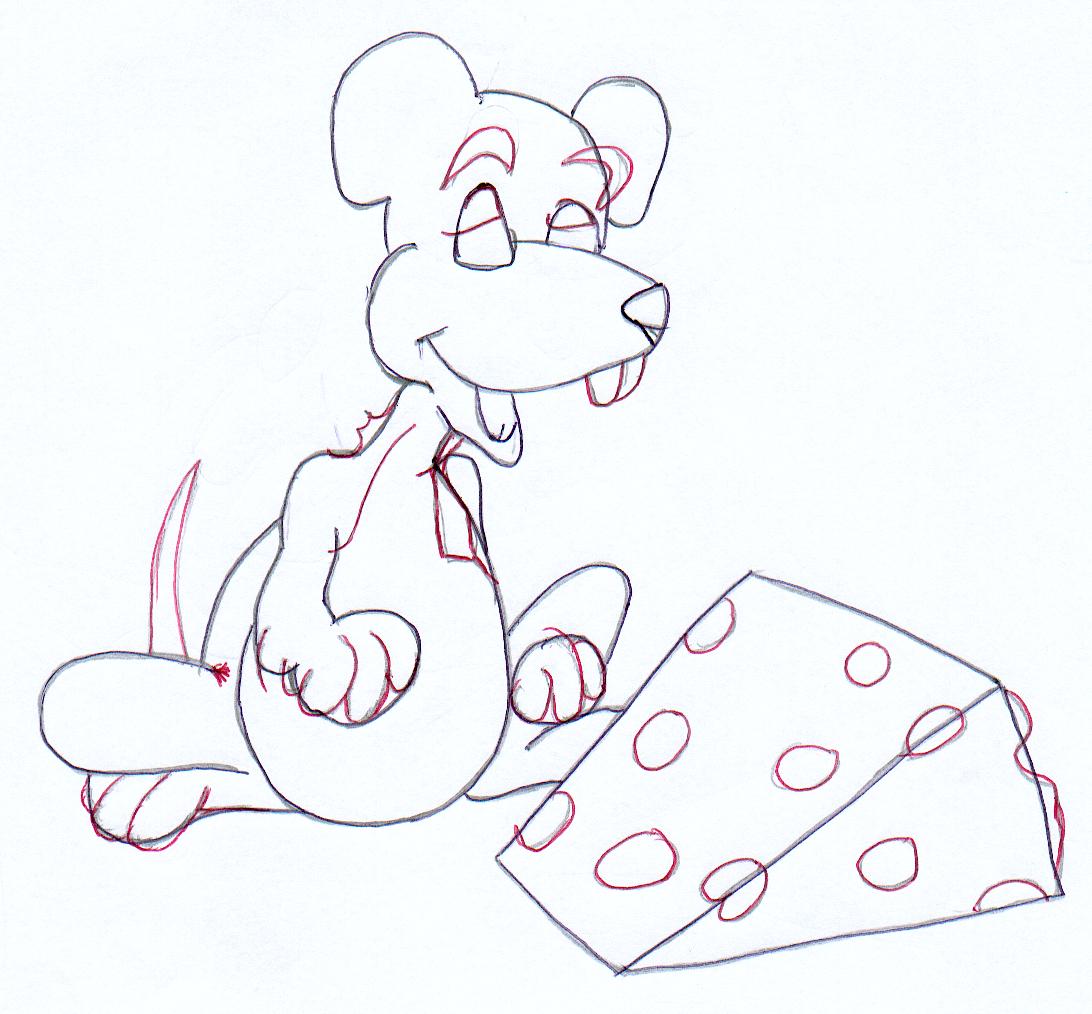
Step Two
1st: Draw Oval Ears and then use U-shapes both of the eyes keeping one on the line 2nd: Draw a triagle shape for the nose and then add a y and u shape for the mouth 3rd: Draw a line to connect the shoulder and leg together 4th: Then add a U shape for the arm and draw to lines connected to a circle and the arm 5th: Then draw an oval and two curves for the other hand and the foot under it 6th: Use another curve for the other foot and connect the cheese to a V shape |
 |
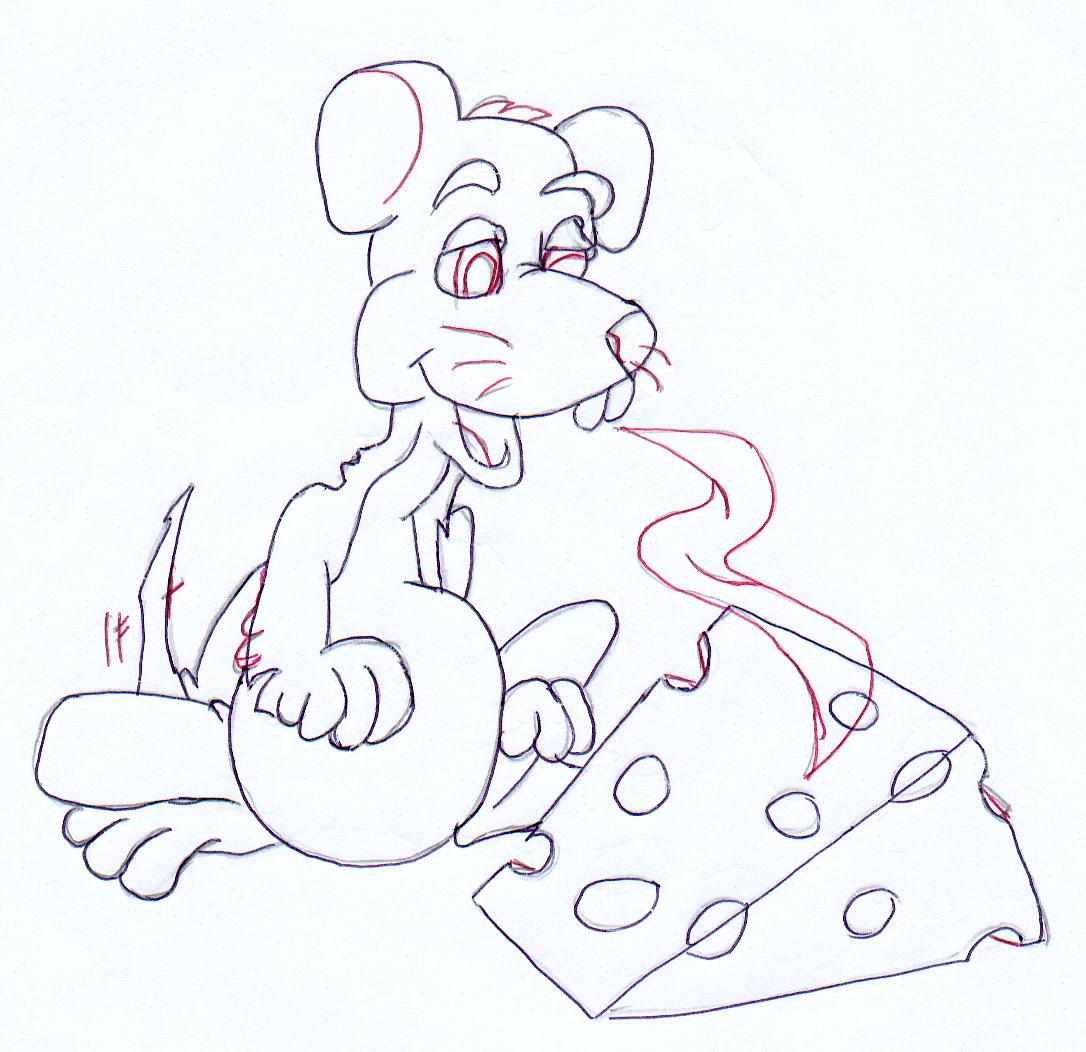
Step Three
Step 1: Attach L shapes to curves for eyelids and bridge of nose Step 2: Add a comma shaped eyebrow and join a curve and U shape for the teeth Step 3: Connect 2 V shapes to to curves for the neck hairs Step 4: Add Long lines for the neck and belly and form a long V shape for the tail Step 5: Add V shapes to the tail and leg Step 6: Use curves and U shapes for the arm, fingers and foot Step 7: Draw oval and heart-shaped cheese holes in the cheese |
 |
Step Four
Step One: Add detail in the eyes with curved lines and part ovals Step Two: Use curved lines and curved V shapes for the hair on the arm and head Step 3: Draw a long curve shape and small V shape inside the ear Step 4: Sketch the whiskers and tongue and add a small curve on the nose Step 5: Make some holes 3d using lines and show the aroma from the cheese Step 6: Add cross markings to show the tail wagging |
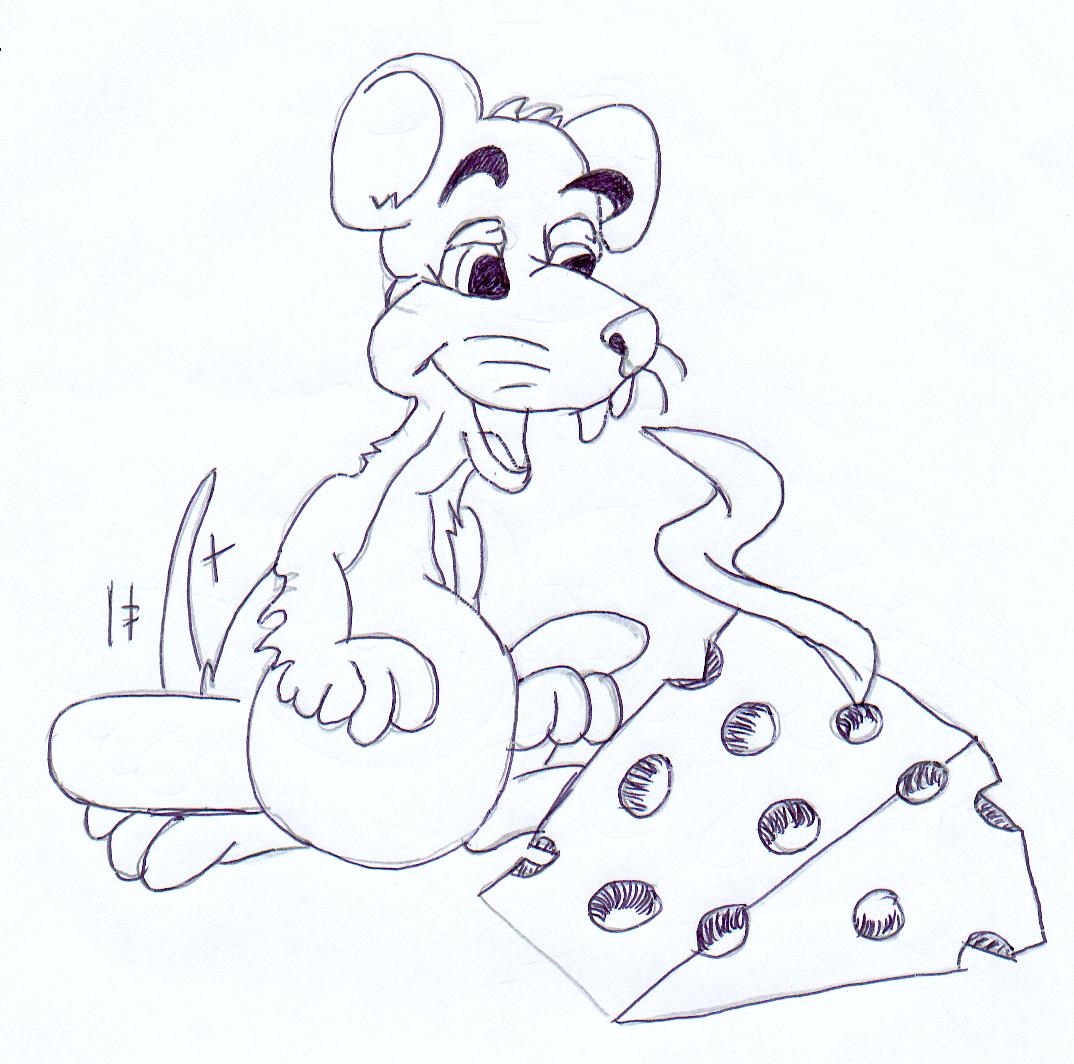 |
Step Five
Step 1: Darken the eyebrows, pupils and nostrils Step 2: Add shadows in the holes of the cheese Step 3: The Tutorial is finally done and the image is complete!!! |